For those who makes handmade soap from the scratch, lye is essential in bring about a chemical reaction that would generate the finishing soap. However, the lye downside is that it is a corrosive material, which could bring about injury, burns, and scarring, if not utilized with accurate safeguard. Fortunately, there are still pathways for novice crafters to utilize lye in a effective and safe manner. Additionally, utilizing various molds to develop the finished product can permit you to develop themed soap that would fitted your preference.
Having the correct mixing bowls. Do not apply equipment that will be used for cooking. Use bowls and equipment made from stainless steel, enamel and tempered glass. Ignore using aluminum and copper as they have a false reaction with lye. Moreover, fewe plastics medlt when mixing with lye.
Get creative when choosing soap molds. You do picking up a variety of soap molds at the local craft store or utilize silicone baking pans. Silicone is prefered as you do peel off the soap molds easy way.
Gather all your tools. Aside from the actual ingredients you need in your soap, making certain you have a quart can jar and pint, a stainless steel thermometer that does read an old towel and newspaper.

Choosing Additives
Pick up dried herbs from online or your local craft store. Certain that you get dried herbs for the soap. Some famous choices are chamomile, lavender, oakmoss or lemongrass. Make certain you understand who will be utilizing your soap as some humans might be more sensitive or even allergic to some herbs. Each soap batch must utilize about a ¼ cup of dried herbs.
Get oils from online or your local craft store. While essential oils coming from the stems, roots, seeds of plants and flowers, their aroma could be artificially producing. Apply about 15-20 drops of oil, or around a teaspoon, for the batch of this size.
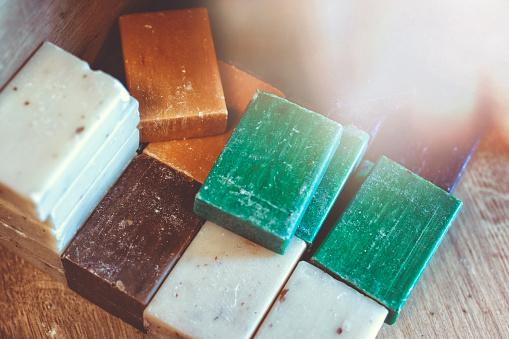
Sticking to natural colors rather than add artificial coloring. powdered chlorophyll develop green and cocoa powder and Cinnamon develop brown soap, while beetroot makes an orange soap and turmeric develop yellow. Food coloring do not holding up well in soap so it’s good to stick to natural colors.
Making Your Soap
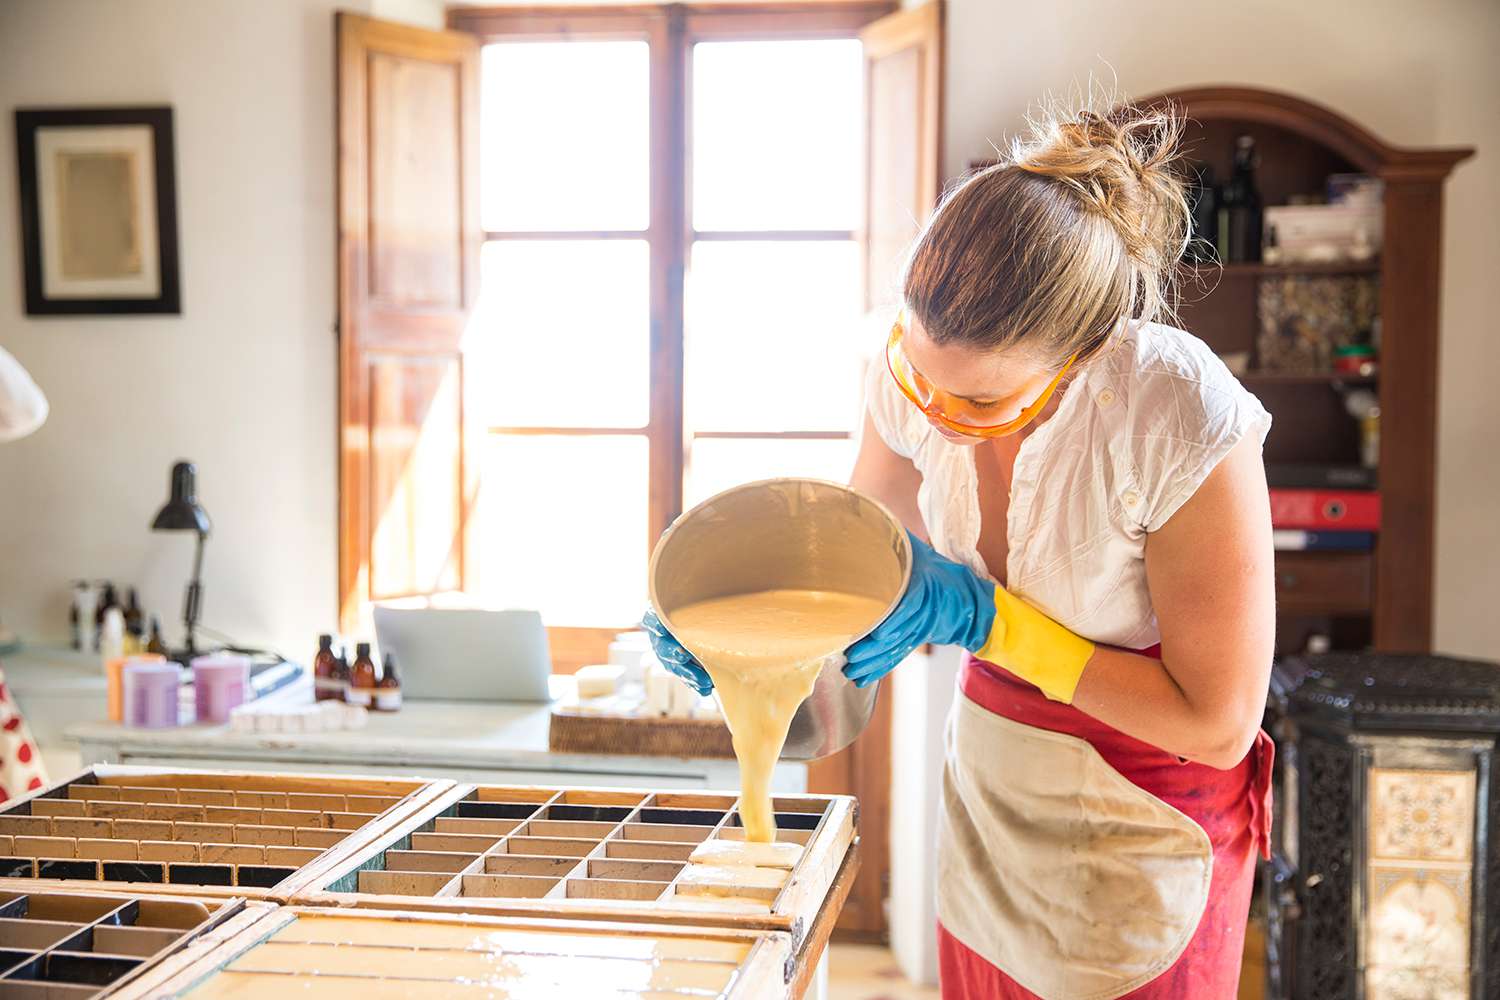
Preparing your work zone and mixing the lye. Utilize newspaper to covering your work. Before working with lye, make certain to have your protective gear on including eye wear and gloves. measure water in your quart canning jar and Scoop ¼ cup of lye. Stir as your slow way pour the lye into the H2O. Ignore the fumes by wear a mask or standing back. Stirring until clear and let it sit.
Heat your oils once mixing together. Mixing your oils together in a pint jar. Heated the pint for about a timeline in the microwave or adding the oils to a pan of water and heated over a stove. The temperature must be around 120 degrees F for your oils.
Add essential oils, herbs, or other preferences. Stirring everything thoroughly and pouring the mixture into your silicone baking molds or soap molds. Covering the molds with plastic wrap and covering with the old towel. The towel permits residual heat to keeping the mixture warm and begin the saponification procedure.
Store the soap safe way utilizing wax paper or an airtight container. Once cured, wrapping your soap in wax paper or placing it in an airtight container as handmade soap develop glycerin, which pulls moisture from air. Moisture might attract dust and debris so keep your soap cover will keep them pure and clean.
Clean Up Correctly
Let your tools sit to get rid of the lye and fat. Neutralizing the lye with white vinegar before wash your equipment. Let all your equipment sitted for some days as residual lye will might burnt your hands while fat will be very tough to removing if fresh. Waiting permits the residual fat and lye to become soap that washes away when soaked in the hottest water.
Wear gloves when clean up. Protecting your hands as soap batter might still irritating your skin even though most of the saponification is off. an apron and Goggles are also good to protect your clothing and eyes.
Use a paper towels and spatula to clean soap mixtures before rinsing. Scrape some extra soap batter with the spatula. Apply paper towels to wipe raw soap from utensils and bowls. Get rid of any extra raw soap material before wash cuts minimizes any harm the lye and oils may do to your septic tank or pipes.
Soak all your containers and equipment. Placing all utensils, containers, and bowls in the sink once you’ve removing any excessive soap. Soaking and washing in hottest water and dish soap. a special sponge and Grease-cutting dish soap for utensils working best.